Here at AWS Made Easy, we love Lambda functions. And, one thing that makes Lambda functions much easier to use are Function URLs. The idea of the Function URL is that it makes a common use case for Lambda functions, namely being publicly accessible via HTTP, much easier. Instead of going through the tedious process of setting up API Gateway to just access one endpoint (all dealing with headers, CORS, and all of that), we can simply configure our Lambda functions to be accessible by a URL.
From the documentation:
Function URLs are dual stack-enabled, supporting IPv4 and IPv6. After you configure a function URL for your function, you can invoke your function through its HTTP(S) endpoint via a web browser, curl, Postman, or any HTTP client. Lambda function URLs use resource-based policies for security and access control. Function URLs also support cross-origin resource sharing (CORS) configuration options.
In other words, if you just want to have a publicly accessible URL – something like quote2clean.com to your Lambda function, Function URLs are the way to go.
As part of our commitment to making AWS “Easy”, we have developed a template to get you started in deploying a Python function to Lambda, complete with a Function URL. You can use this template here: https://github.com/AWSMadeEasy/sam-lambda-py-graviton
In this repository, we use AWS SAM, short for Serverless Application Model, to configure the function. SAM is essentially a high level set of opinionated abstractions built on top of CloudFormation, with the goal of supporting common serverless application components. SAM is far more simple and limited in scope than CloudFormation, but it is still quite complex on its own, with a 364 page manual (don’t worry, CloudFormation’s User Guide is well over 1000 pages). AWS SAM also comes with the AWS sam-cli, a tool for building, testing, and deploying serverless applications.
A SAM deployment is specified by a template.yaml file. Our template file is included below:
In this SAM Template, we define a lambda function called PyFunction. The source code is located in a file called src/app.py, in a function called lambda_handler. It runs Python 3.9 on the ARM64 (Graviton) architecture. The FunctionUrlConfig block on line 20 means that we are configuring this lambda function with a function URL. This endpoint is configured to allow CORS from any origin, meaning you can call the function from anywhere. The output of the template is the URL itself. Note that when a Lambda function includes a Function URL in SAM, an entity called ${FUNCTION_NAME}Url is created, and it is this entity that contains the FunctionUrl attribute.
Using the Template
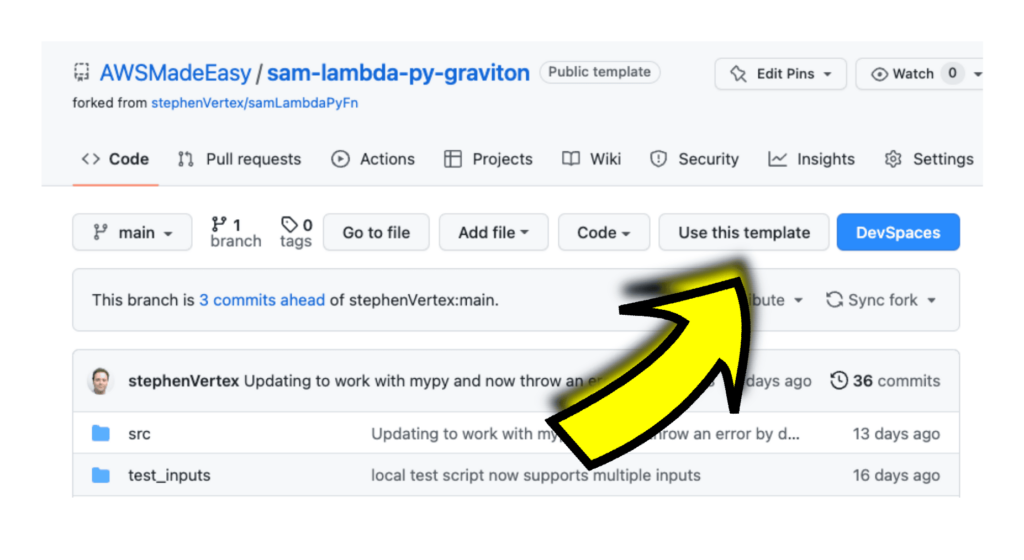
Alright, enough background information. Let’s try using the template. The first step is to click on the “Use this template” button in the repository.
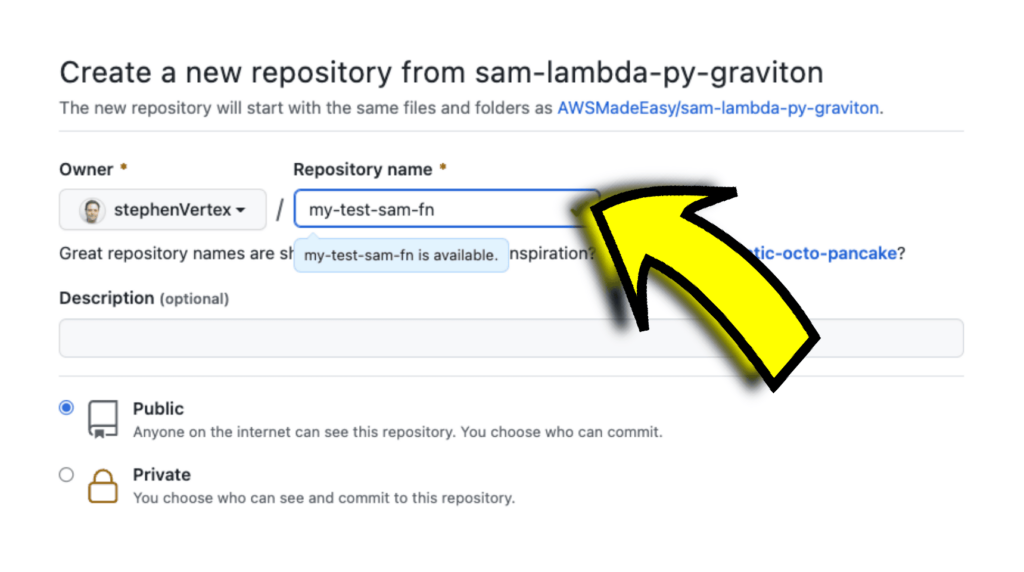
Name the repository:
Now, before you start a DevSpace, just wait a second.
Set Your Variables
You are going to want to configure 3 environment variables for your DevSpaces. Go to https://ey-graviton.devspaces.com/workspaces , click on “Settings” in the top menu, and then “Variables” in the sub-menu. You should have four variables defined for this space.
AWS_ACCESS_KEY_IDAWS_SECRET_ACCESS_KEYAWS_DEFAULT_REGIONPY_LAMBDA_FN_STACK
The first three variables are your standard AWS configuration variables. If you want to learn all about this, then check out Managing access keys for IAM users. The final variable, PY_LAMBDA_FN_STACK, is the name of the CloudFormation stack. For this example, I’ll call it my-test-sam-fn-stack.

I could show you the other variables, but that would be a bad idea.
Starting a DevSpace
Once you have the four variables set, you can start a DevSpace. As we are targeting ARM64, lets use the AWS Graviton DevSpaces. If you haven’t already used it, head over to Graviton DevSpaces right now. It is completely free to use, and you will have to authorize it with your GitHub account. Once you’ve done this, then you can start DevSpaces. There are 2 ways to this:
- Install the DevSpaces Chrome Extension. This will add a “DevSpaces” button to GitHub.

You will need to configure the extension. Simply go to chrome://extensions, select DevSpaces, click on “Extension Options”, and set it up the DevSpaces installation URL to be http://ey-graviton.devspaces.com/: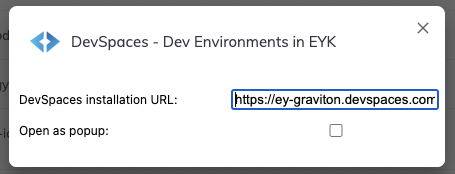
- Simply the prefix http://ey-graviton.devspaces.com/# to the front of your GitHub repository URL. In fact, this is all that the chrome extension above does.
Do either one of these things, and it will launch you into a DevSpace. If it is the first time you are launching this, it may take a minute or two to build and cache the Docker image associated with this. Once you’re using this frequently, the DevSpace will start in a second or two.
Edit and Deploy the Function
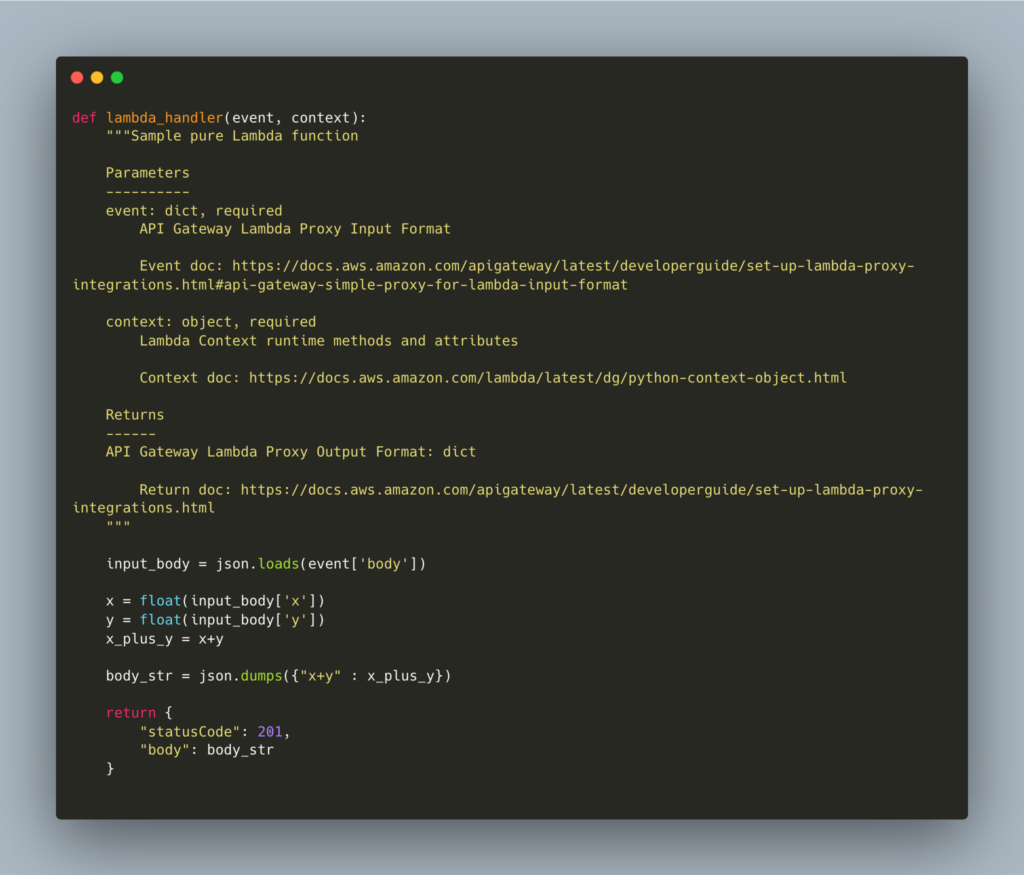
In the DevSpace, open up src/app.py. By default it looks like this:
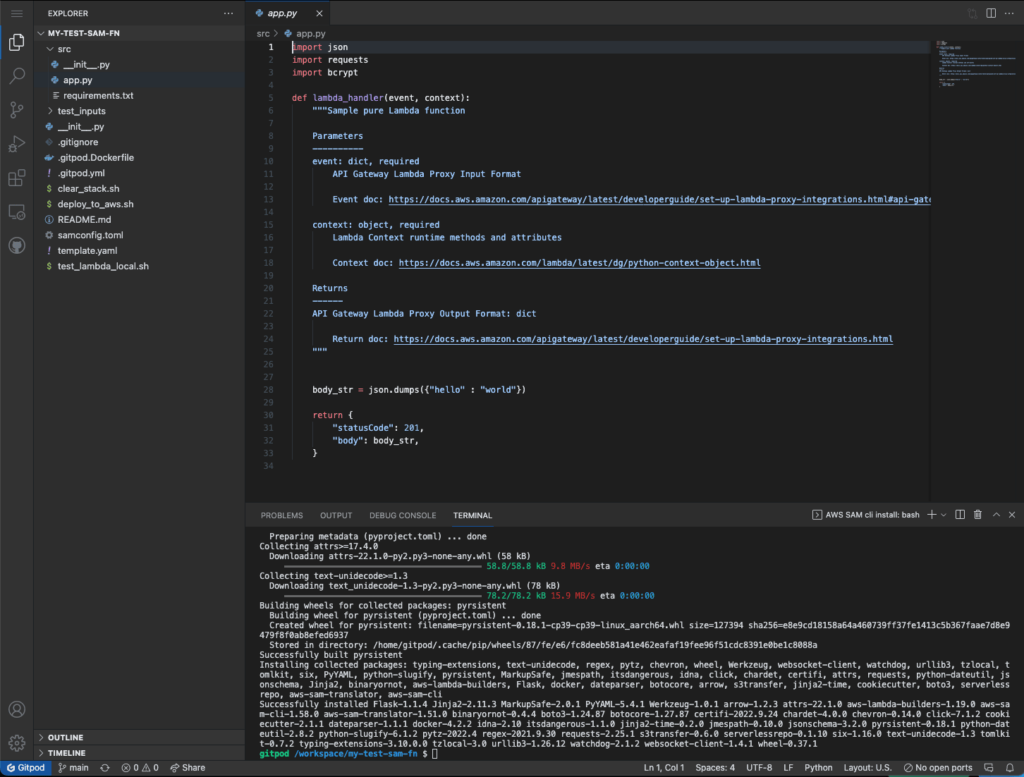
Now, it is up to you. Take the incoming event, do something to it, and return some informational JSON. Note that the JSON you return is set to be the “body” of the return object, and it returns a stringified JSON object.
Before we make a change, let’s deploy this. You can simply run the deploy_to_aws.sh script.
$ ./deploy_to_aws.sh
It should look like this:
Note that the ending object is the URL we want.
https://uphvqpv5ak4565nop564p46qiy0hddnq.lambda-url.us-east-1.on.aws/
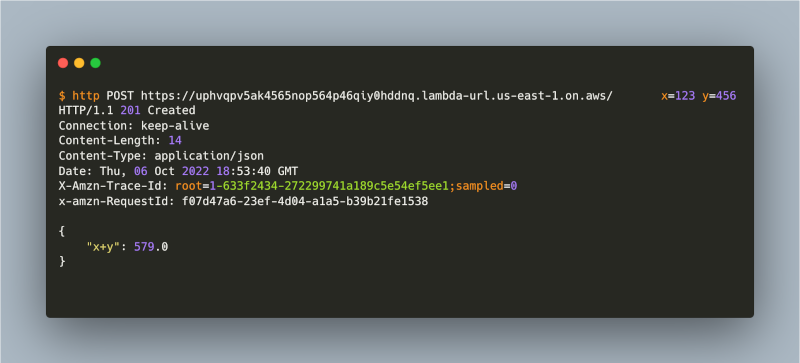
We can do a POST request on this URL. I like using httpie for this, or Postman if you want a GUI.
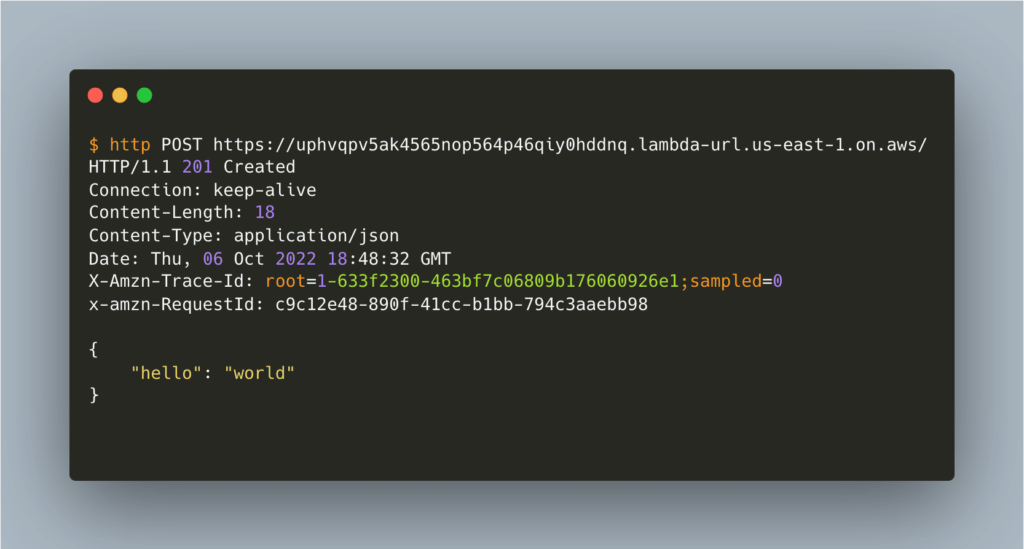
Now, let’s modify the application to implement Addition As A Service. We can modify the app/src.py to look like this:
Lets run ./deploy_to_aws.sh again. The Function URL won’t change. After a few seconds, we can call our new endpoint. The input JSON looks like:
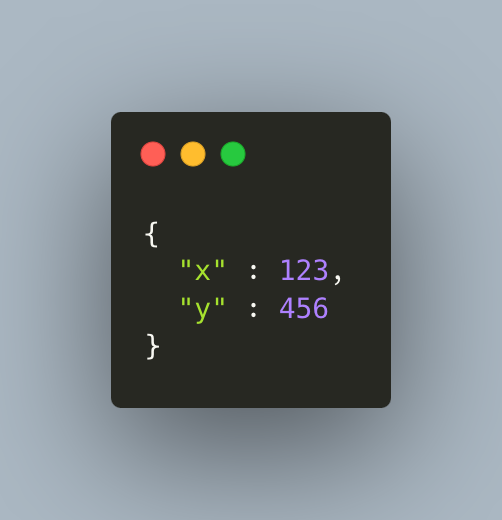
Calling the API with this input JSON, it will return us a JSON with the answer:
See https://github.com/stephenVertex/my-test-sam-fn to experiment with this repository. Fork it and try to implement subtraction, and then you will have a true Subtraction As A Service, a true SAAS!